Tristan /
How to connect your Umbrel node to Joule
Ethereum has a popular browser extension called MetaMask that makes it trivial for users to interact with DeFi apps from their browsers.
Fewer people are aware of the fact that Bitcoin has a great equivalent for its Lightning apps called Joule!
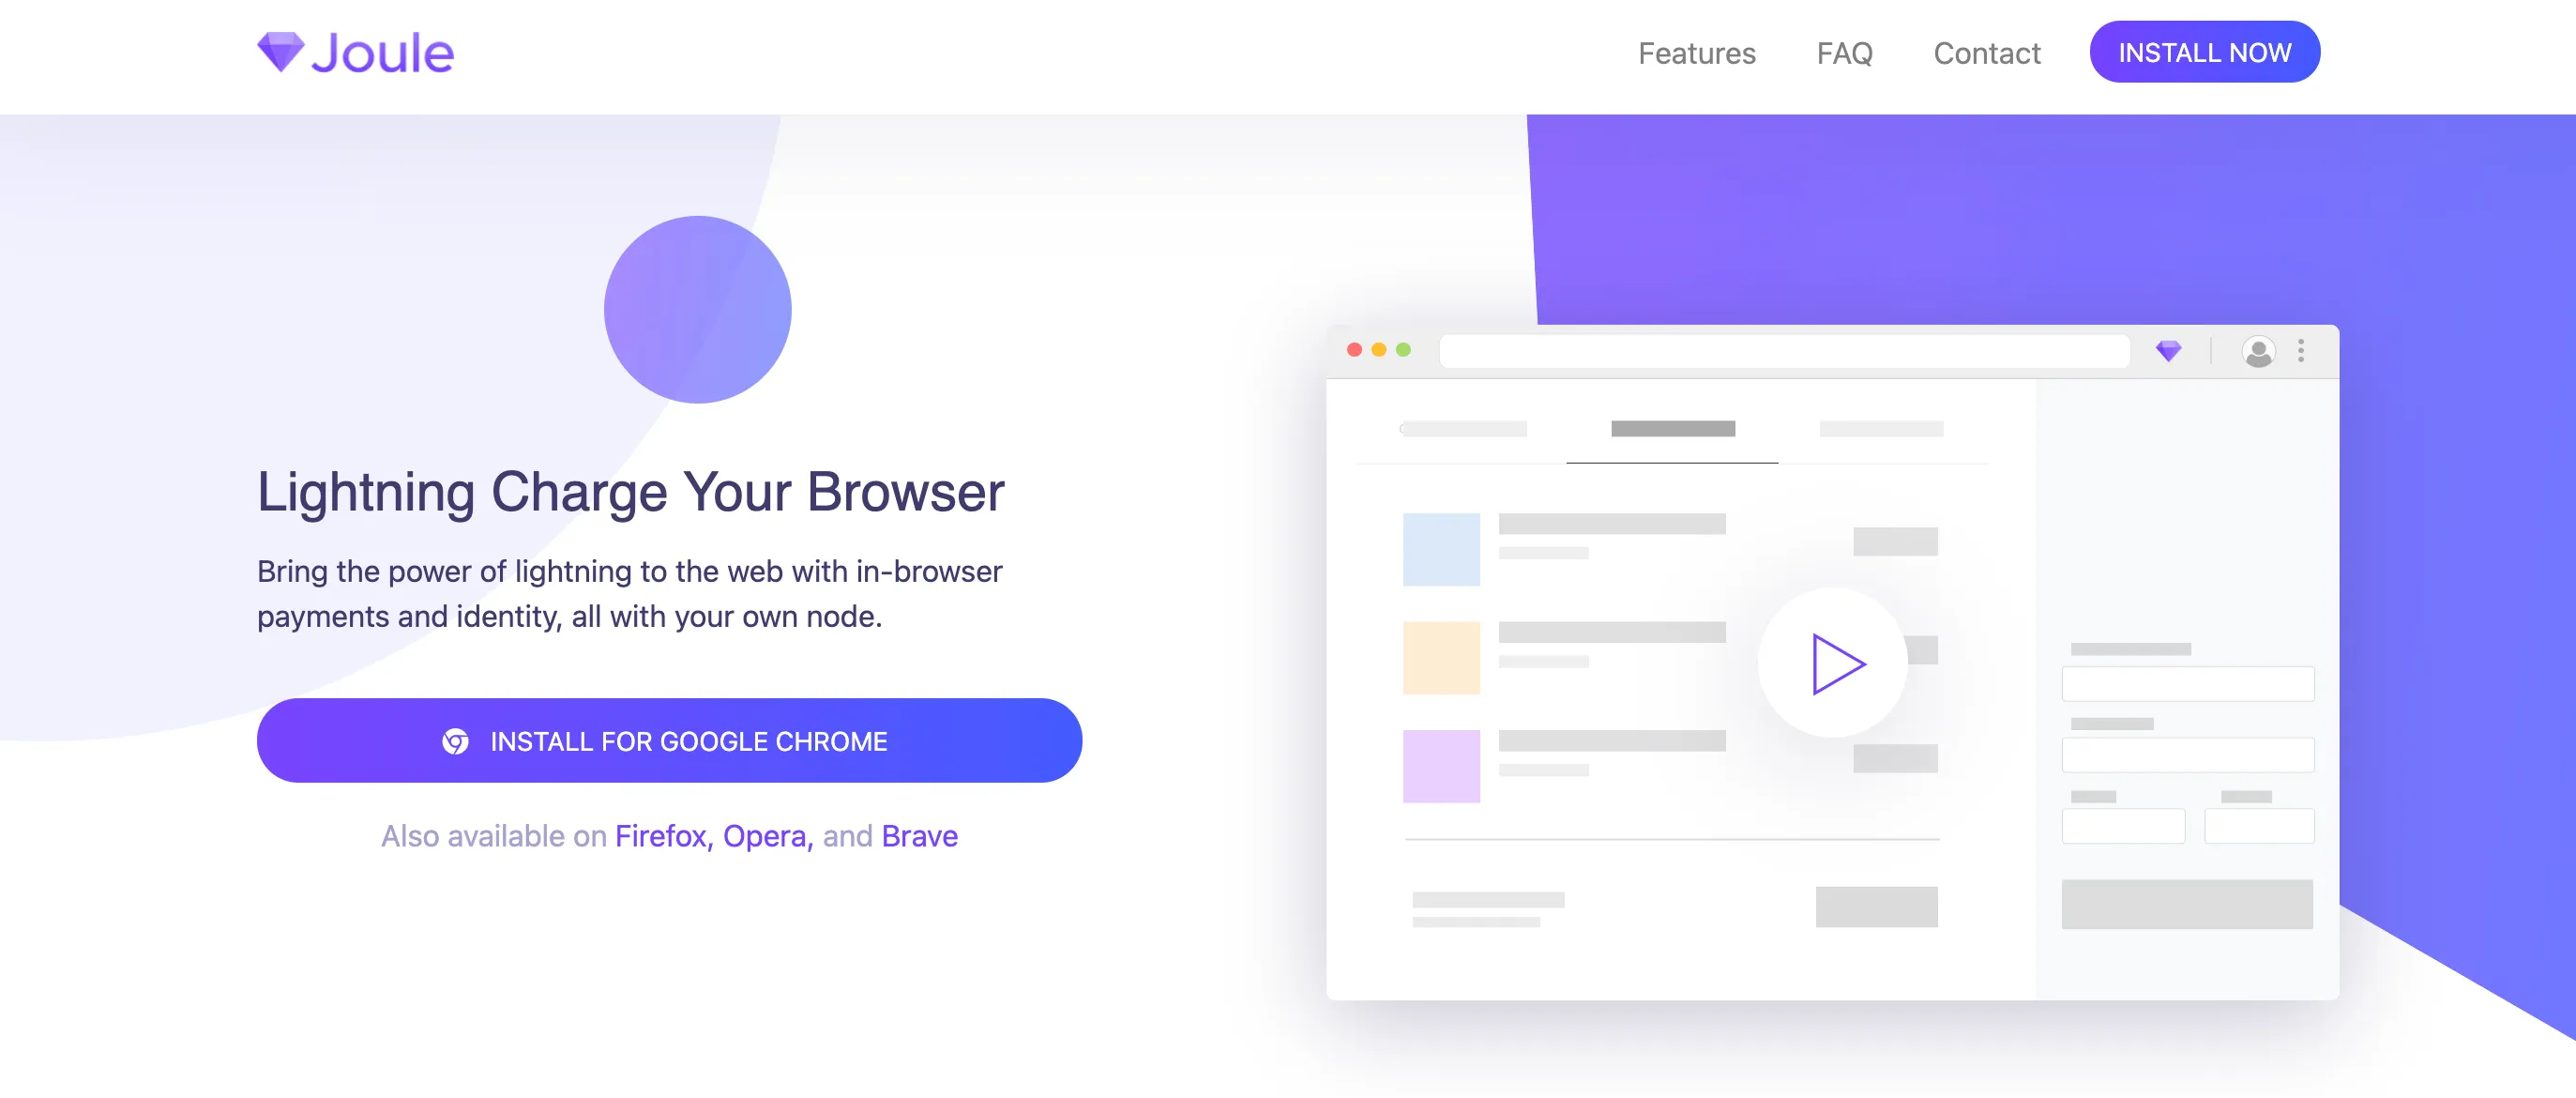
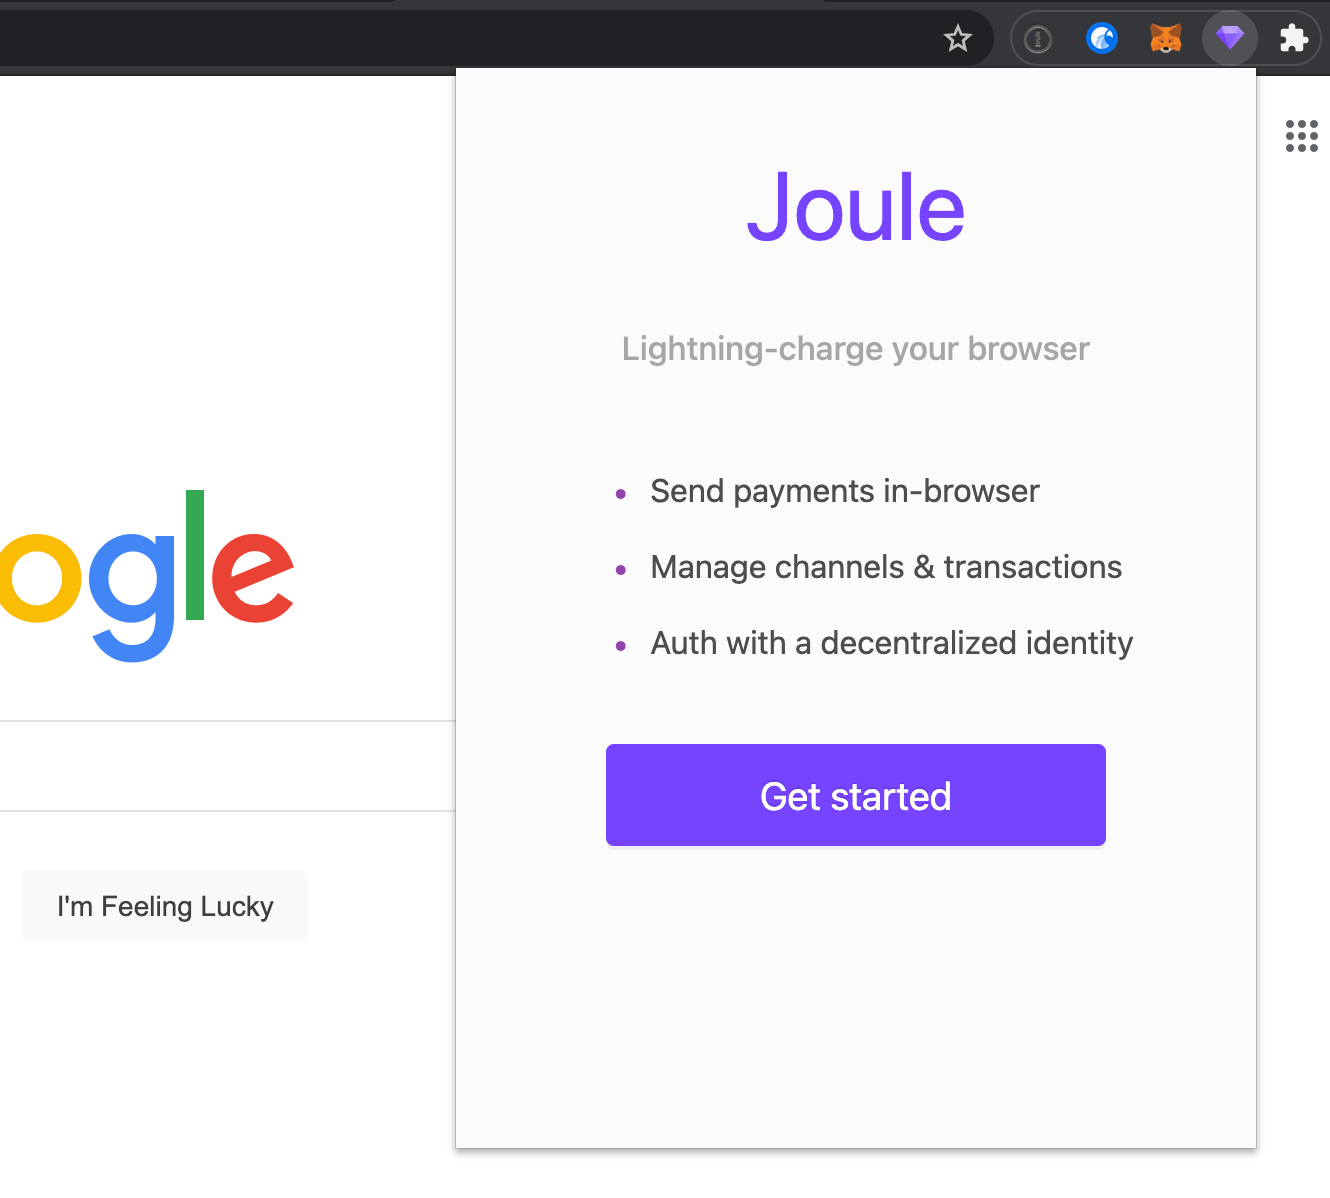
 The Joule website
Thanks to Umbrel, it’s already much easier for average Bitcoin users to set up their own node and get started with Lightning. Connecting it to Joule takes this experience even further and makes it a joy to interact with LApps in your browser!
Curiously, there doesn’t seem to be any guides explaining how to use the two together (although there is a pull request aiming at make this pairing easier in the future).
Until then, here’s a step-by-step guide on how to make it work!
This guide assumes that you already have an Umbrel node up and running. We will be using the Chrome browser in this guide, but the Joule extension also works with Firefox, Opera and Brave.
Step 1:
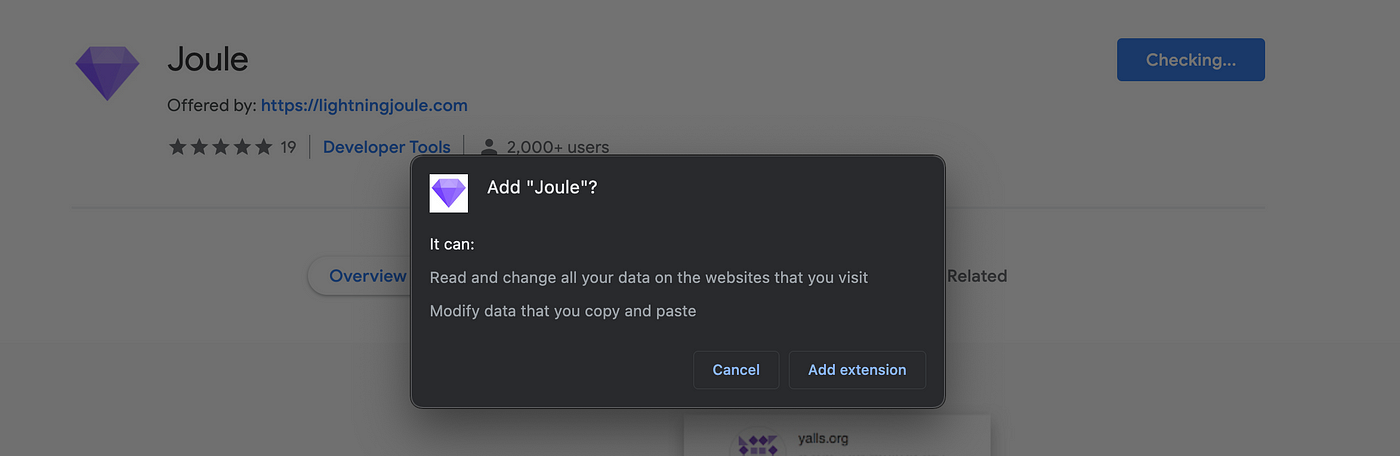
Go to the Joule website and download the browser extension.
If you’re using Google Chrome, you will be redirected to the Chrome web store, and you’ll have to click “Add to Chrome”.
Step 2:
Open the newly added extension and click “Get started”.
You will be redirect to a page asking you what kind of node you have. Select “Local node”.
Joule will request additional permissions to read and change data on localhost. Click “Allow”.
Step 3:
You will now be redirected to a page where you need to type in the URL for your node (the prefilled default is https://localhost:8080). Change the value to https://umbrel.local:8080 and click “Connect”:
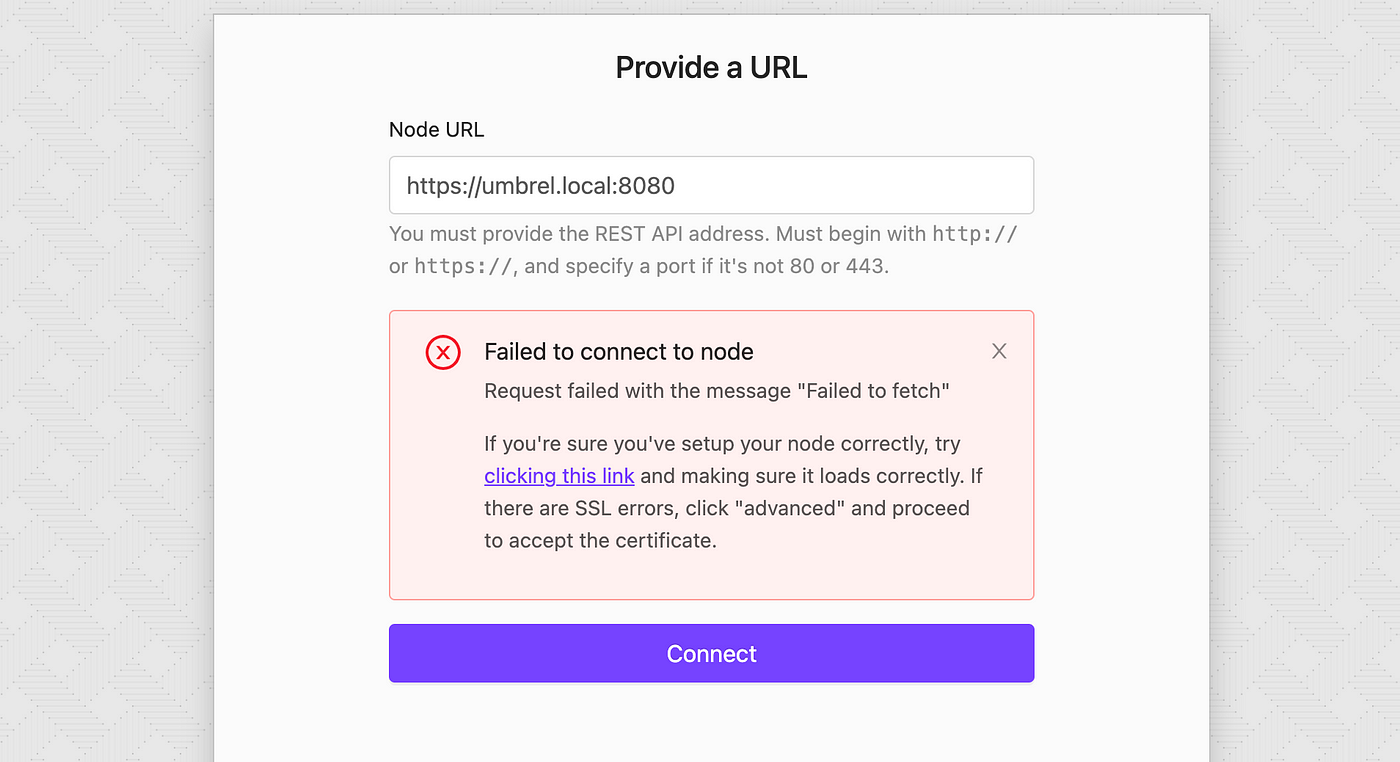
After clicking “Allow” on the next Chrome prompt, you will probably still get an error message saying that it failed to connect to the node.
In that case, click on “clicking this link” in the error message. A new tab will open with a Chrome security warning. Click on “Advanced” and ignore the certificate warning.
You should now see an error message like this:

This is actually a good sign. You can now go back to the original tab, click “Connect” once more and you will be able to proceed!
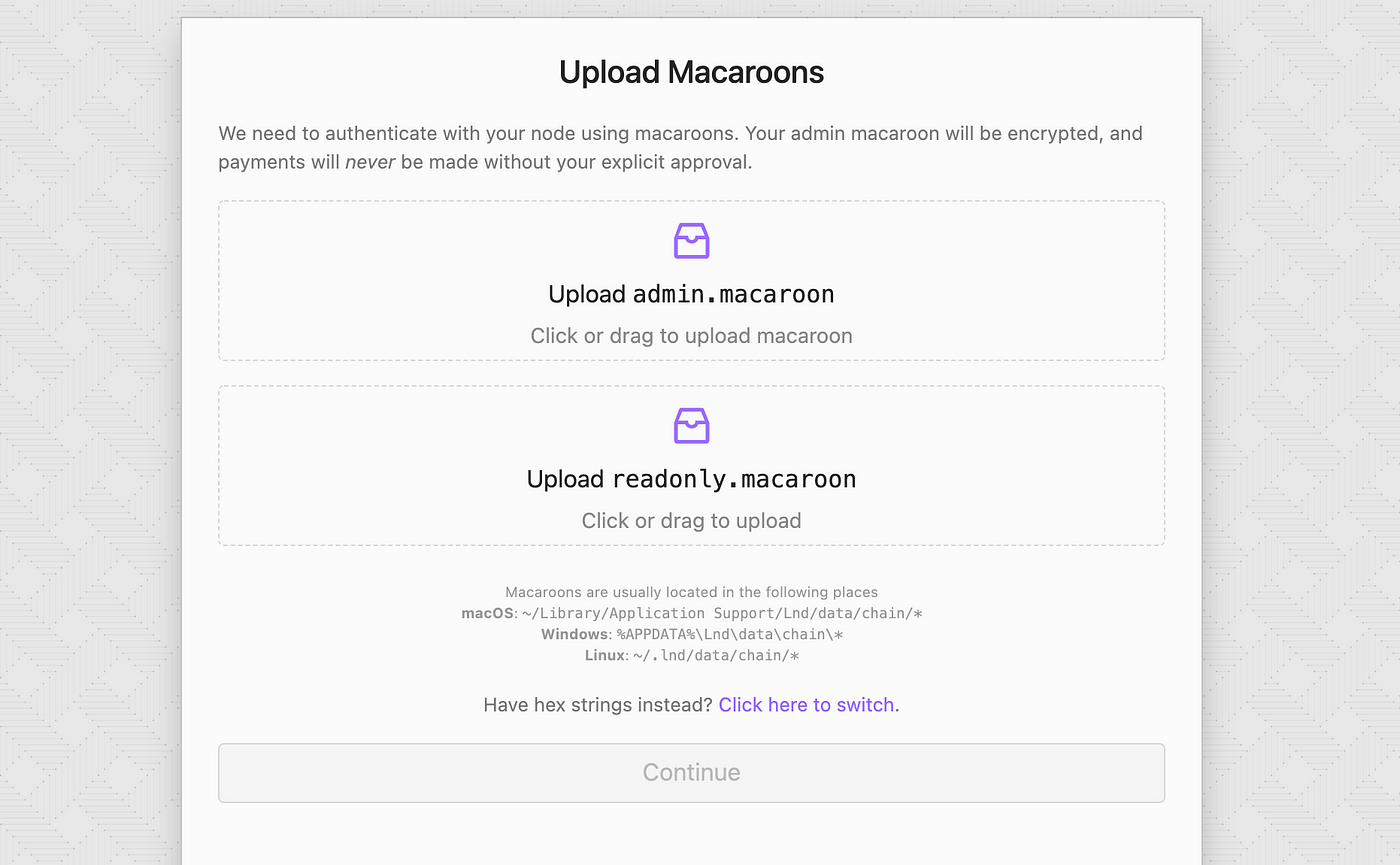
You should now see a page asking you to upload your macaroon files. These are used to verify that Joule has the right permissions to perform actions on your Umbrel node.
Getting these files from Umbrel is slightly tricky; you will have to use the command line to download them through SSH.

Open your computer’s terminal application.
If you’re on Mac or Linux, there’s a built-in command line tool in your terminal called SCP that makes this relatively easy.
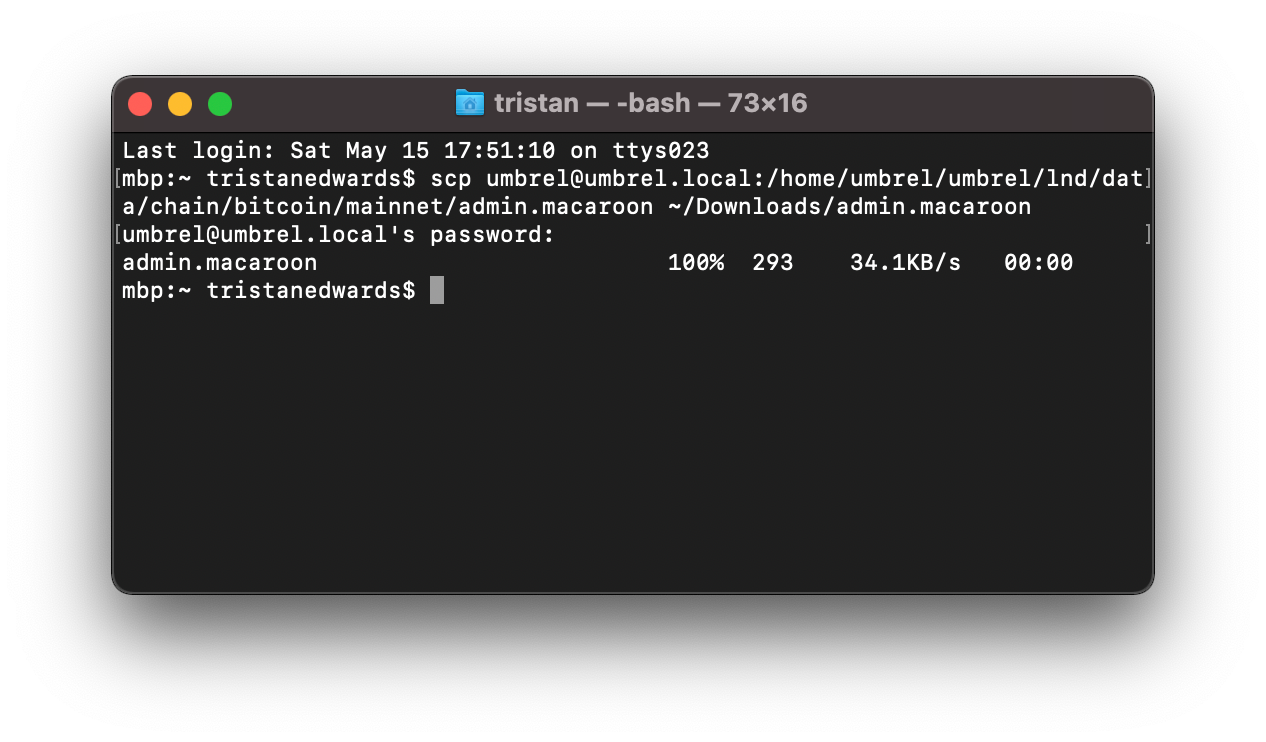
We’ll start with the admin.macaroon file. Open the terminal app and run the following command to download the file from your Umbrel node to your Downloads folder (assuming that you’re using a Mac).
scp umbrel@umbrel.local:/home/umbrel/umbrel/lnd/data/chain/bitcoin/mainnet/admin.macaroon ~/Downloads/admin.macaroonYou will be asked for a password. This is the same password that you use to log in to your Umbrel node (the default is moneyprintergobrrr). Note that the terminal will not give you any feedback when you type in your password (so it might look as if you’re not really typing), but don’t worry, just type it as usual and hit enter.
After that, you should see a percentage progress while the file gets downloaded to your computer:
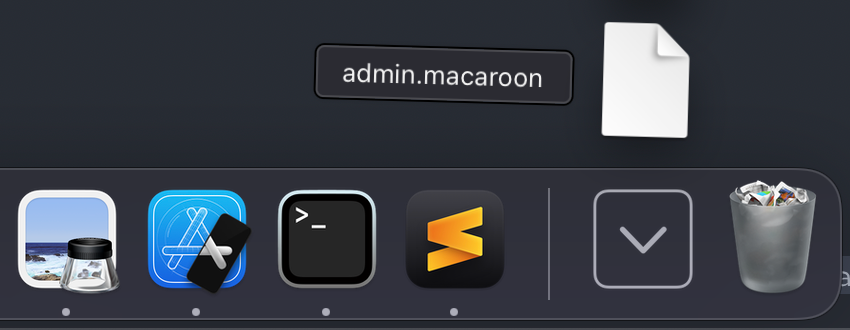
There it is!
Now that we have the file, let’s repeat the same process for the readonly.macaroon file:
scp umbrel@umbrel.local:/home/umbrel/umbrel/lnd/data/chain/bitcoin/mainnet/readonly.macaroon ~/Downloads/readonly.macaroonYou should now have both files downloaded to your computer.
Now head back to the extension and drag and drop both files to their placeholders and click “Continue”:
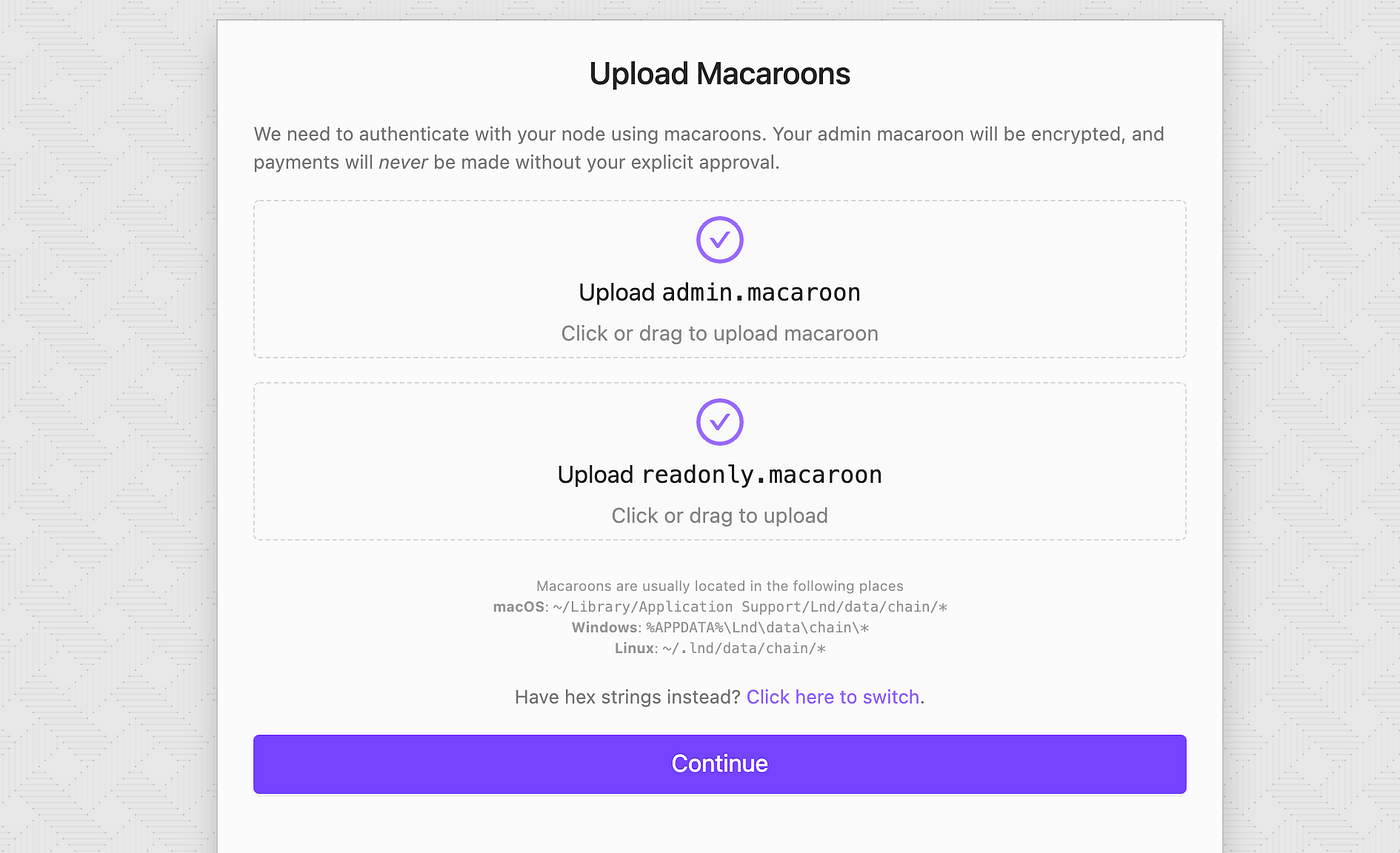
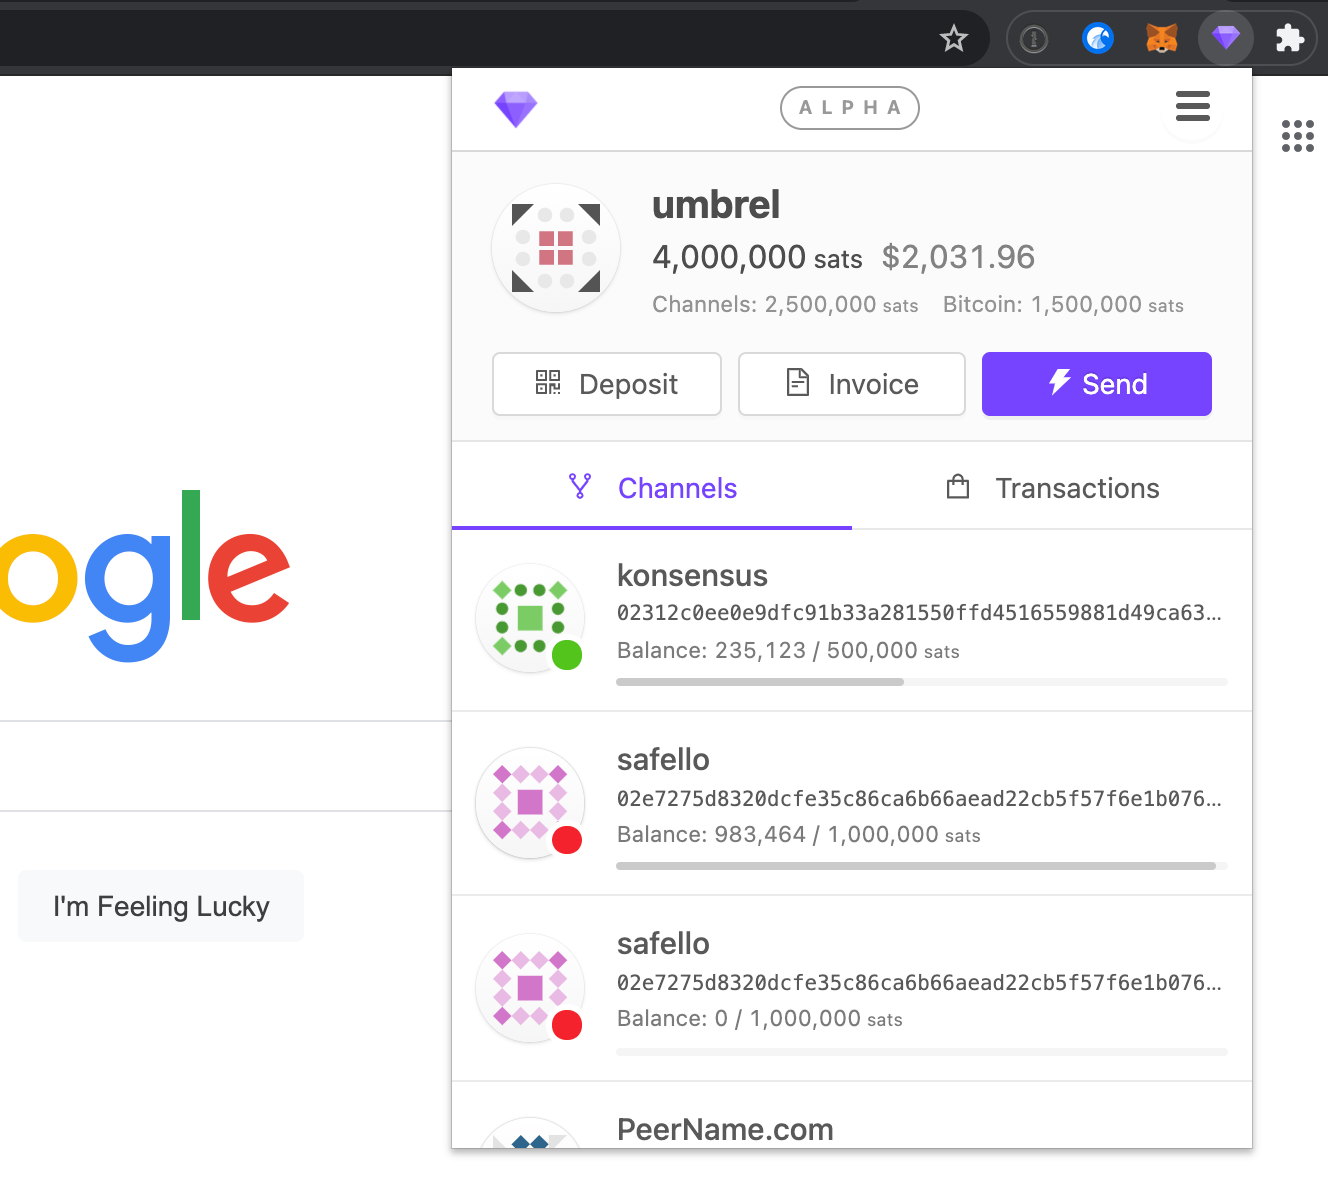
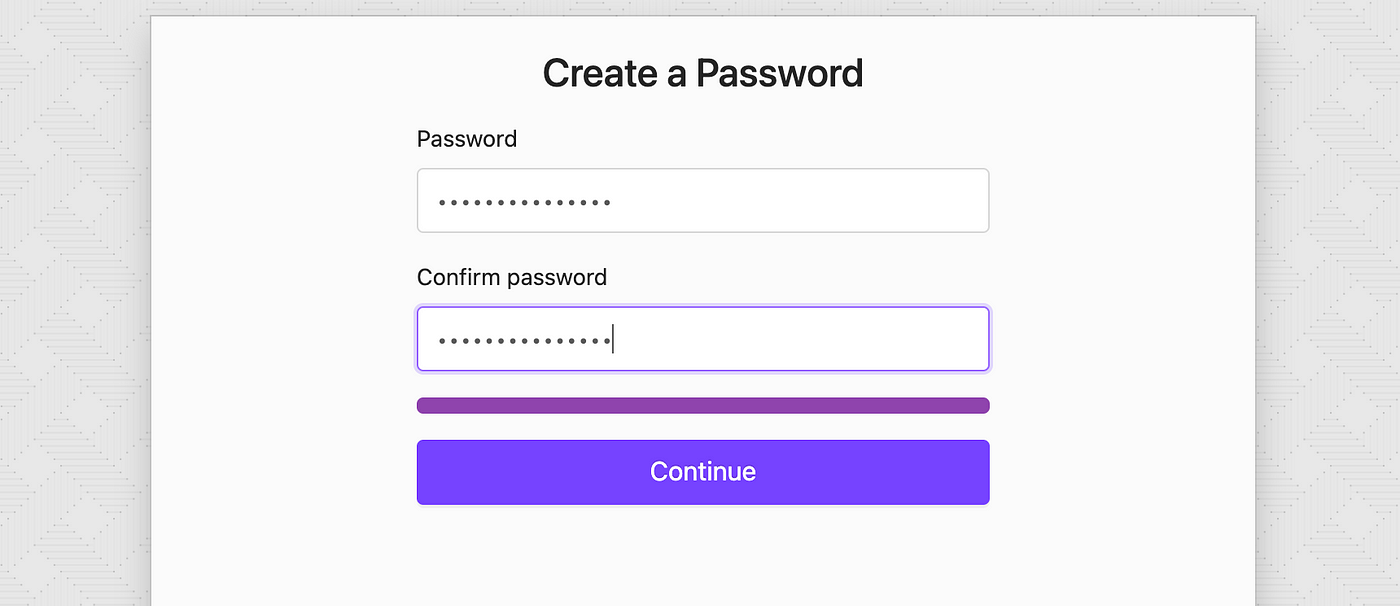
Boom! You should now see your node; all that’s left now is to confirm it. You will also be asked to create a new password to log in to your Joule account.

That’s it, you are now ready to start using your Umbrel node through Joule! 🎉